kubeadm startup Kubernetes less than v1.20.0 (centos+docker+ipvs+calico)
一、更新系统软件(全部节点)
由于 Docker 对系统内核有一定的要求,所以我们最好使用 yum 来更新系统软件及其内核。
#备份本地 yum 源
$ mv /etc/yum.repos.d/CentOS-Base.repo /etc/yum.repos.d/CentOS-Base.repo_bak

# 获取阿里 yum 源配置文件
$ wget -O /etc/yum.repos.d/CentOS-Base.repo http://mirrors.aliyun.com/repo/Centos-7.repo

#清理 yum
$ yum clean all

#更新软件版本并且更新现有软件
$ yum -y update
二、基础环境设置(全部节点)
Kubernetes 需要一定的环境来保证正常运行,如各个节点时间同步,主机名称解析,关闭防火墙等等。
1、修改 Host
分布式系统环境中的多主机通信通常基于主机名称进行,这在 IP 地址存在变化的可能性时为主机提供了固定的访问入口,因此一般需要有专用的 DNS 服务负责解析各节点主机。考虑到此处部署的是测试集群,因此为了降低系复杂度,这里将基于 hosts 的文件进行主机名称解析。
$ vim /etc/hosts
# 加入以下内容
192.168.2.11   k8s-master
192.168.2.12   k8s-node-01
192.168.2.13   k8s-node-02
2、修改 Hostname
kubernetes 中会以各个服务的 hostname 为其节点命名,所以需要进入不同的服务器修改 hostname 名称。
#修改 192.168.2.11 服务器,设置 hostname,然后将 hostname 写入 hosts
$ hostnamectl  set-hostname  k8s-master
$ echo "127.0.0.1   $(hostname)" >> /etc/hosts

#修改 192.168.2.12 服务器,设置 hostname,然后将 hostname 写入 hosts
$ hostnamectl  set-hostname  k8s-node-01
$ echo "127.0.0.1   $(hostname)" >> /etc/hosts

#修改 192.168.2.13 服务器,设置 hostname,然后将 hostname 写入 hosts
$ hostnamectl  set-hostname  k8s-node-02
$ echo "127.0.0.1   $(hostname)" >> /etc/hosts
3、主机时间同步
etcd 集群各机器需要时间同步,chrony 用于系统时间同步;
将各个服务器的时间同步,并设置开机启动同步时间服务。
 $ timedatectl set-timezone Asia/Shanghai
 $ systemctl start chronyd.service && systemctl enable chronyd.service

 #查看
 $ timedatectl status
 #System clock synchronized: yes,表示时钟已同步;
 #         NTP service: active,表示开启了时钟同步服务;
 #         RTC in local TZ: no

 #option
 # 将当前的 UTC 时间写入硬件时钟
timedatectl set-local-rtc 0

# 重启依赖于系统时间的服务
systemctl restart rsyslog
systemctl restart crond
4、关闭防火墙服务
关闭防火墙,并禁止开启启动;顺便清理一下规则。
注意:因为是测试环境,为了方便、简单,直接关闭;但最好不要关闭,通过操作防火墙,让固定流量放行即可
systemctl stop firewalld && systemctl disable firewalld
iptables -F && iptables -X && iptables -F -t nat && iptables -X -t nat如果各个主机启用了防火墙策略,需要开放Kubernetes各个组件所需要的端口,可以查看Installing kubeadm中的"Check required ports"一节开放相关端口或者关闭主机的防火墙
5、关闭并禁用SELinux
关闭SELinux,并编辑 /etc/sysconfig selinux 文件,以彻底禁用 SELinux
$ setenforce 0
$ sed -i 's/^SELINUX=enforcing$/SELINUX=disabled/' /etc/selinux/config
## 或者
$ sed -i 's/^SELINUX=.*/SELINUX=disabled/' /etc/selinux/config

# 查看selinux状态
$ getenforce
6、禁用 Swap 设备
关闭当前已启用的所有 Swap 设备:
$ swapoff -a && sysctl -w vm.swappiness=0编辑 fstab 配置文件,注释掉标识为 Swap 设备的所有行:
$ vi /etc/fstab

#/dev/mapper/centos-swap swap  swap  defaults  0 0

## 或者
$ sed -i '/ swap / s/^\(.*\)$/#\1/g' /etc/fstab
7、设置内核网络模块参数
加载netfilter模块:
cat << EOF > /etc/modules-load.d/k8s-net-modules.conf.conf
br_netfilter
EOF
执行以下命令使模块生效:
#挂载 br_netfilter
$ modprobe br_netfilter
配置内核参数:
$ cat <<EOF > /etc/sysctl.d/k8s.conf
net.ipv4.tcp_slow_start_after_idle=0
net.core.rmem_max=16777216
fs.inotify.max_user_watches=1048576
kernel.softlockup_all_cpu_backtrace=1
kernel.softlockup_panic=1
fs.file-max=2097152
fs.nr_open=2097152
fs.inotify.max_user_instances=8192
fs.inotify.max_queued_events=16384
vm.max_map_count=262144
net.core.netdev_max_backlog=16384
net.ipv4.tcp_wmem=4096 12582912 16777216
net.core.wmem_max=16777216
net.core.somaxconn=32768
net.ipv4.ip_forward=1
net.ipv4.tcp_max_syn_backlog=8096
net.bridge.bridge-nf-call-iptables=1
net.bridge.bridge-nf-call-ip6tables=1
net.bridge.bridge-nf-call-arptables=1
net.ipv4.tcp_rmem=4096 12582912 16777216
vm.swappiness=0
kernel.sysrq=1
net.ipv4.neigh.default.gc_stale_time=120
net.ipv4.conf.all.rp_filter=0
net.ipv4.conf.default.rp_filter=0
net.ipv4.conf.default.arp_announce=2
net.ipv4.conf.lo.arp_announce=2
net.ipv4.conf.all.arp_announce=2
net.ipv4.tcp_max_tw_buckets=5000
net.ipv4.tcp_syncookies=1
net.ipv4.tcp_synack_retries=2
net.ipv6.conf.lo.disable_ipv6=1
net.ipv6.conf.all.disable_ipv6=1
net.ipv6.conf.default.disable_ipv6=1
net.ipv6.conf.all.forwarding=0
net.ipv4.ip_local_port_range=1024 65535
net.ipv4.tcp_keepalive_time=600
net.ipv4.tcp_keepalive_probes=10
net.ipv4.tcp_keepalive_intvl=30
net.nf_conntrack_max=25000000
net.netfilter.nf_conntrack_max=25000000
net.netfilter.nf_conntrack_tcp_timeout_established=180
net.netfilter.nf_conntrack_tcp_timeout_time_wait=120
net.netfilter.nf_conntrack_tcp_timeout_close_wait=60
net.netfilter.nf_conntrack_tcp_timeout_fin_wait=12
net.ipv4.tcp_timestamps=0
net.ipv4.tcp_orphan_retries=3
kernel.pid_max=4194303
net.ipv4.tcp_tw_reuse=1
net.ipv4.tcp_fin_timeout=1
vm.min_free_kbytes=262144
kernel.msgmnb=65535
kernel.msgmax=65535
kernel.shmmax=68719476736
kernel.shmall=4294967296
kernel.core_uses_pid=1
net.ipv4.neigh.default.gc_thresh1=0
net.ipv4.neigh.default.gc_thresh2=4096
net.ipv4.neigh.default.gc_thresh3=8192
net.netfilter.nf_conntrack_tcp_timeout_close=3
net.ipv4.conf.all.route_localnet=1
EOF
注意:关闭 tcp_tw_recycle,否则与 NAT 冲突,可能导致服务不通; 内核低于4版本添加 fs.may_detach_mounts=1
使配置生效:
#使配置生效
$ sysctl -p /etc/sysctl.d/k8s.conf

#查看是否生成相关文件
$ ls /proc/sys/net/bridge
8、设置内核 IPVS 模块
由于ipvs已经加入到了内核的主干,所以为kube-proxy开启ipvs的前提需要加载以下的内核模块:
- ip_vs
- ip_vs_rr
- ip_vs_wrr
- ip_vs_sh
- nf_conntrack_ipv4 (内核4版本以上 nf_conntrack 替换 nf_conntrack_ipv4)
$ cat > /etc/sysconfig/modules/ipvs.modules <<EOF

#!/bin/bash
modprobe -- ip_vs
modprobe -- ip_vs_rr
modprobe -- ip_vs_wrr
modprobe -- ip_vs_sh
modprobe -- nf_conntrack_ipv4

EOF
执行脚本并查看是否正常加载内核模块:
#修改脚本权限
$ chmod 755 /etc/sysconfig/modules/ipvs.modules

#执行脚本
$ bash /etc/sysconfig/modules/ipvs.modules

#查看是否已经正确加载所需的内核模块
$ lsmod | grep -e ip_vs -e nf_conntrack_ipv4
注:上面脚本创建了的
/etc/sysconfig/modules/ipvs.modules文件,保证在节点重启后能自动加载所需模块。 使用lsmod | grep -e ip_vs -e nf_conntrack_ipv4命令查看是否已经正确加载所需的内核模块。
接下来还需要确保各个节点上已经安装了ipset软件包,为了便于查看ipvs的代理规则,最好安装一下管理工具ipvsadm。
$ yum install -y ipset ipvsadm如果以上前提条件如果不满足,则即使kube-proxy的配置开启了ipvs模式,也会退回到iptables模式
9、配置资源限制
echo "* soft nofile 655360" >> /etc/security/limits.conf
echo "* hard nofile 655360" >> /etc/security/limits.conf
echo "* soft nproc 655360"  >> /etc/security/limits.conf
echo "* hard nproc 655360"  >> /etc/security/limits.conf
echo "* soft memlock  unlimited"  >> /etc/security/limits.conf
echo "* hard memlock  unlimited"  >> /etc/security/limits.conf
centos7还需修改:
sed -i 's/4096/655350/' /etc/security/limits.d/20-nproc.conf10、安装依赖包以及相关工具
$ yum install -y epel-release
$ yum install -y yum-utils device-mapper-persistent-data lvm2 net-tools conntrack-tools wget vim ntpdate libseccomp libtool-ltdl chrony conntrack jq iptables curl sysstat libseccomp wget socat git
三、规划
先安装kubeadm(跳到第四步),初步查看本次安装的kubernetes各个组件的版本
# 例如:
$ kubeadm config images list
I0516 11:23:19.087877    1340 version.go:255] remote version is much newer: v1.24.0; falling back to: stable-1.23
k8s.gcr.io/kube-apiserver:v1.16.3
k8s.gcr.io/kube-controller-manager:v1.16.3
k8s.gcr.io/kube-scheduler:v1.16.3
k8s.gcr.io/kube-proxy:v1.16.3
k8s.gcr.io/pause:3.6
k8s.gcr.io/etcd:3.5.1-0
k8s.gcr.io/coredns/coredns:v1.8.6
四、系统环境
- CentOS 版本:7.7
- Docker 版本:18.09.9-3
- Calico 版本:v3.10
- Kubernetes 版本:1.16.3
- Kubernetes Newwork 模式:IPVS
- Kubernetes Dashboard 版本:dashboard:v2.0.0-beta6
| 地址 | 主机名 | 内存&CPU | 角色 |
|---|---|---|---|
| 192.168.2.11 | k8s-master | 2C & 2G | master |
| 192.168.2.12 | k8s-node-01 | 4c & 8G | node |
| 192.168.2.13 | k8s-node-02 | 4c & 8G | node |
五、安装Docker(全部节点)
1、移除之前安装过的Docker
$ sudo yum -y remove docker \
                  docker-client \
                  docker-client-latest \
                  docker-common \
                  docker-latest \
                  docker-latest-logrotate \
                  docker-logrotate \
                  docker-selinux \
                  docker-engine-selinux \
                  docker-ce-cli \
                  docker-engine
查看还有没有存在的 Docker 组件,一定要确保删除干净:
$ rpm -qa | grep docker有则通过命令 yum -y remove XXX 来删除,比如:
$ yum remove docker-ce-cli2、更换 Docker 的 yum 源
由于官方下载速度比较慢,所以需要更改 Docker 安装的 yum 源,这里推荐用阿里镜像源:
$ yum-config-manager --add-repo http://mirrors.aliyun.com/docker-ce/linux/centos/docker-ce.repo3、显示 docker 所有可安装版本:
 sudo yum list docker-ce --showduplicates |sort -r
 * updates: mirrors.aliyun.com
Loading mirror speeds from cached hostfile
Loaded plugins: fastestmirror
Installed Packages
 * extras: mirrors.aliyun.com
docker-ce.x86_64            3:20.10.9-3.el7                    docker-ce-stable
docker-ce.x86_64            3:20.10.8-3.el7                    docker-ce-stable
docker-ce.x86_64            3:20.10.7-3.el7                    docker-ce-stable
docker-ce.x86_64            3:20.10.6-3.el7                    docker-ce-stable
docker-ce.x86_64            3:20.10.5-3.el7                    docker-ce-stable
docker-ce.x86_64            3:20.10.4-3.el7                    docker-ce-stable
docker-ce.x86_64            3:20.10.3-3.el7                    docker-ce-stable
docker-ce.x86_64            3:20.10.2-3.el7                    docker-ce-stable
docker-ce.x86_64            3:20.10.16-3.el7                   docker-ce-stable
docker-ce.x86_64            3:20.10.15-3.el7                   docker-ce-stable
docker-ce.x86_64            3:20.10.14-3.el7                   docker-ce-stable
docker-ce.x86_64            3:20.10.1-3.el7                    docker-ce-stable
docker-ce.x86_64            3:20.10.13-3.el7                   docker-ce-stable
docker-ce.x86_64            3:20.10.12-3.el7                   docker-ce-stable
docker-ce.x86_64            3:20.10.11-3.el7                   docker-ce-stable
docker-ce.x86_64            3:20.10.10-3.el7                   docker-ce-stable
docker-ce.x86_64            3:20.10.0-3.el7                    docker-ce-stable
4、安装指定版本 docker
注意:安装前一定要提前查询将要安装的 Kubernetes 版本是否和 Docker 版本对应。
$ yum install -y docker-ce-18.09.9-3.el7设置镜像存储目录,找到大点的挂载的目录进行存储
$ vi /lib/systemd/system/docker.service

#找到这行,往后面加上存储目录,例如这里是 --graph /apps/docker
ExecStart=/usr/bin/docker --graph /apps/docker
5、配置 Docker 参数和镜像加速器
Kubernetes 推荐的一些 Docker 配置参数,这里配置一下。还有就是由于国内访问 Docker 仓库速度很慢,所以国内几家云厂商推出镜像加速下载的代理加速器,这里也需要配置一下。
创建 Docker 配置文件的目录并添加配置文件:
$ mkdir -p /etc/docker

$ cat > /etc/docker/daemon.json << EOF

{
  "exec-opts": ["native.cgroupdriver=systemd"],
  "registry-mirrors": [
  	  "https://dockerhub.azk8s.cn",
      "http://hub-mirror.c.163.com",
      "https://registry.docker-cn.com"
  ],
  "storage-driver": "overlay2",
  "storage-opts": [
    "overlay2.override_kernel_check=true"
  ],
  "log-driver": "json-file",
  "log-opts": {
    "max-size": "100m",
    "max-file":"5"
  }
}

EOF
6、启动 docker 并设置 docker 开机启动
启动 Docker:
$ systemctl start docker && systemctl enable docker如果 Docker 已经启动,则需要重启 Docker:
$ systemctl daemon-reload && systemctl restart docker六、安装 kubelet、kubectl、kubeadm(全部节点)
1、配置可用的国内 yum 源
$ cat <<EOF > /etc/yum.repos.d/kubernetes.repo

[kubernetes]
name=Kubernetes
baseurl=https://mirrors.aliyun.com/kubernetes/yum/repos/kubernetes-el7-x86_64/
enabled=1
gpgcheck=0
repo_gpgcheck=0
gpgkey=https://mirrors.aliyun.com/kubernetes/yum/doc/yum-key.gpg https://mirrors.aliyun.com/kubernetes/yum/doc/rpm-package-key.gpg

EOF
2、安装 kubelet、kubectl、kubeadm
- kubelet: 在集群中的每个节点上用来启动 pod 和 container 等。
- kubectl: 用来与集群通信的命令行工具。
- kubeadm: 用来初始化集群的指令。
注意安装顺序,一定不要先安装 kubeadm,因为 kubeadm 会自动安装最新版本的 kubelet 与 kubectl,导致版本不一致问题。
#安装 kubelet
$ yum install -y kubelet-1.16.3-0

#安装 kubectl
$ yum install -y kubectl-1.16.3-0

#安装 kubeadm
$ yum install -y kubeadm-1.16.3-0
3、启动 kubelet 并配置开机启动
$ systemctl start kubelet && systemctl enable kubelet检查状态时会发现 kubelet 是 failed 状态,等初 master 节点初始化完成后即可显示正常。
七、kubeadm 安装 kubernetes(Master 节点)
创建 kubeadm 配置文件 kubeadm-config.yaml,然后需要配置一些参数:
- 配置 localAPIEndpoint.advertiseAddress 参数,调整为你的 Master 服务器地址。
- 配置 imageRepository 参数,调整 kubernetes 镜像下载地址为阿里云。
- 配置 networking.podSubnet 参数,调整为你要设置的网络范围。
kubeadm-config.yaml
$ cat > kubeadm-config.yaml << EOF

apiVersion: kubeadm.k8s.io/v1beta2
kind: InitConfiguration
localAPIEndpoint:
  advertiseAddress: 192.168.2.11
  bindPort: 6443
nodeRegistration:
  taints:
  - effect: PreferNoSchedule
    key: node-role.kubernetes.io/master
---
apiVersion: kubeadm.k8s.io/v1beta2
kind: ClusterConfiguration
imageRepository: registry.aliyuncs.com/google_containers
kubernetesVersion: v1.16.3
networking:
  podSubnet: 10.244.0.0/16
  serviceSubnet: 10.96.0.0/12
---
apiVersion: kubeproxy.config.k8s.io/v1alpha1
kind: KubeProxyConfiguration
mode: ipvs

EOF
kubeadm 初始化 kubernetes 集群:
$ kubeadm init --config kubeadm-config.yaml部署日志信息:
[init] Using Kubernetes version: v1.16.3
[preflight] Running pre-flight checks
        [WARNING Firewalld]: firewalld is active, please ensure ports [6443 10250] are open or your cluster rrectly function co[preflight] Pulling images required for setting up a Kubernetes cluster
[preflight] This might take a minute or two, depending on the speed of your internet connection
[preflight] You can also perform this action in beforehand using 'kubeadm config images pull'
[certs] Using certificateDir folder "/etc/kubernetes/pki"
[certs] Generating "ca" certificate and key
[certs] Generating "apiserver" certificate and key
[certs] apiserver serving cert is signed for DNS names [kubernetes kubernetes.default kubernetes.default.svc kubernetes.default.svc.cluster.local master01] and IPs [10.96.0.1 172.21.51.20]
[certs] Generating "apiserver-kubelet-client" certificate and key
[certs] Generating "front-proxy-ca" certificate and key
[certs] Generating "front-proxy-client" certificate and key
[certs] Generating "etcd/ca" certificate and key
[certs] Generating "etcd/server" certificate and key
[certs] etcd/server serving cert is signed for DNS names [localhost master01] and IPs [172.21.51.20 127.0.0.1 ::1]
[certs] Generating "etcd/peer" certificate and key
[certs] etcd/peer serving cert is signed for DNS names [localhost master01] and IPs [172.21.51.20 127.0.0.1 ::1]
[certs] Generating "etcd/healthcheck-client" certificate and key
[certs] Generating "apiserver-etcd-client" certificate and key
[certs] Generating "sa" key and public key
[kubeconfig] Using kubeconfig folder "/etc/kubernetes"
[kubeconfig] Writing "admin.conf" kubeconfig file
[kubeconfig] Writing "kubelet.conf" kubeconfig file
[kubeconfig] Writing "controller-manager.conf" kubeconfig file
[kubeconfig] Writing "scheduler.conf" kubeconfig file
[kubelet-start] Writing kubelet environment file with flags to file "/var/lib/kubelet/kubeadm-flags.env"
[kubelet-start] Writing kubelet configuration to file "/var/lib/kubelet/config.yaml"
[kubelet-start] Starting the kubelet
[control-plane] Using manifest folder "/etc/kubernetes/manifests"
[control-plane] Creating static Pod manifest for "kube-apiserver"
[control-plane] Creating static Pod manifest for "kube-controller-manager"
[control-plane] Creating static Pod manifest for "kube-scheduler"
[etcd] Creating static Pod manifest for local etcd in "/etc/kubernetes/manifests"
[wait-control-plane] Waiting for the kubelet to boot up the control plane as static Pods from directory "/etc/kubernetes/manifests". This can take up to 4m0s
[apiclient] All control plane components are healthy after 8.504005 seconds
[upload-config] Storing the configuration used in ConfigMap "kubeadm-config" in the "kube-system" Namespace
[kubelet] Creating a ConfigMap "kubelet-config-1.23" in namespace kube-system with the configuration for the kubelets in the cluster
NOTE: The "kubelet-config-1.23" naming of the kubelet ConfigMap is deprecated. Once the UnversionedKubeletConfigMap feature gate graduates to Beta the default name will become just "kubelet-config". Kubeadm upgrade will handle this transition transparently.
[upload-certs] Skipping phase. Please see --upload-certs
[mark-control-plane] Marking the node master01 as control-plane by adding the labels: [node-role.kubernetes.io/master(deprecated) node-role.kubernetes.io/control-plane node.kubernetes.io/exclude-from-external-load-balancers]
[mark-control-plane] Marking the node master01 as control-plane by adding the taints [node-role.kubernetes.io/master:NoSchedule]
[bootstrap-token] Using token: tqtgb2.yr26dau6tm617rgy
[bootstrap-token] Configuring bootstrap tokens, cluster-info ConfigMap, RBAC Roles
[bootstrap-token] configured RBAC rules to allow Node Bootstrap tokens to get nodes
[bootstrap-token] configured RBAC rules to allow Node Bootstrap tokens to post CSRs in order for nodes to get long term certificate credentials
[bootstrap-token] configured RBAC rules to allow the csrapprover controller automatically approve CSRs from a Node Bootstrap Token
[bootstrap-token] configured RBAC rules to allow certificate rotation for all node client certificates in the cluster
[bootstrap-token] Creating the "cluster-info" ConfigMap in the "kube-public" namespace
[kubelet-finalize] Updating "/etc/kubernetes/kubelet.conf" to point to a rotatable kubelet client certificate and key
[addons] Applied essential addon: CoreDNS
[addons] Applied essential addon: kube-proxy

Your Kubernetes control-plane has initialized successfully!

To start using your cluster, you need to run the following as a regular user:

  mkdir -p $HOME/.kube
  sudo cp -i /etc/kubernetes/admin.conf $HOME/.kube/config
  sudo chown $(id -u):$(id -g) $HOME/.kube/config

Alternatively, if you are the root user, you can run:

  export KUBECONFIG=/etc/kubernetes/admin.conf

You should now deploy a pod network to the cluster.
Run "kubectl apply -f [podnetwork].yaml" with one of the options listed at:
  https://kubernetes.io/docs/concepts/cluster-administration/addons/

Then you can join any number of worker nodes by running the following on each as root:

kubeadm join 192.168.2.11:6443 --token tqtgb2.yr26dau6tm617rgy \
        --discovery-token-ca-cert-hash sha256:c38fa7ed7a99fe928980b4a9dc1df31f26ae60547dfd6599c055ca652f7ad985
在此处看日志可以知道,可以通过下面命令,添加 kubernetes 相关环境变量:
$ mkdir -p $HOME/.kube
$ sudo cp -i /etc/kubernetes/admin.conf $HOME/.kube/config
$ sudo chown $(id -u):$(id -g) $HOME/.kube/config
八、工作节点加入集群(Work Node 节点)
根据上面 Master 节点创建 Kubernetes 集群时的日志信息,可以知道在各个节点上执行下面命令来让工作节点加入主节点:
$ kubeadm join 192.168.2.11:6443 --token 4udy8a.f77ai0zun477kx0p \
    --discovery-token-ca-cert-hash sha256:4645472f24b438e0ecf5964b6dcd64913f68e0f9f7458768cfb96a9ab16b4212
如果上面 token 过期,则可以通过 kubeadm token create --print-join-command 命令重新获取加入集群的指令。
九、部署网络插件(Master 节点)
Kubernetes 中可以部署很多种网络插件,不过比较流行也推荐的有两种:
- Flannel: Flannel 是基于 Overlay 网络模型的网络插件,能够方便部署,一般部署后只要不出问题,一般不需要管它。
- Calico: 与 Flannel 不同,Calico 是一个三层的数据中心网络方案,使用 BGP 路由协议在主机之间路由数据包,可以灵活配置网络策略。
这两种网络根据环境任选其一即可,这里使用的是 Calico,可以按下面步骤部署:
1、部署 Calico 网络插件
下载 Calico 部署文件,并替换里面的网络范围为上面 kubeadm 中 networking.podSubnet 配置的值。
#下载 calico 部署文件
$ wget https://docs.projectcalico.org/v3.10/getting-started/kubernetes/installation/hosted/kubernetes-datastore/calico-networking/1.7/calico.yaml

#替换 calico 部署文件的 IP 为 kubeadm 中的 networking.podSubnet 参数 10.244.0.0。
$ sed -i 's/192.168.0.0/10.244.0.0/g' calico.yaml

#部署 Calico 插件
$ kubectl apply -f calico.yaml
查看一下calico向k8s中添加的api资源:
kubectl api-resources | grep calico
bgpconfigurations                              crd.projectcalico.org/v1               false        BGPConfiguration
bgppeers                                       crd.projectcalico.org/v1               false        BGPPeer
blockaffinities                                crd.projectcalico.org/v1               false        BlockAffinity
caliconodestatuses                             crd.projectcalico.org/v1               false        CalicoNodeStatus
clusterinformations                            crd.projectcalico.org/v1               false        ClusterInformation
felixconfigurations                            crd.projectcalico.org/v1               false        FelixConfiguration
globalnetworkpolicies                          crd.projectcalico.org/v1               false        GlobalNetworkPolicy
globalnetworksets                              crd.projectcalico.org/v1               false        GlobalNetworkSet
hostendpoints                                  crd.projectcalico.org/v1               false        HostEndpoint
ipamblocks                                     crd.projectcalico.org/v1               false        IPAMBlock
ipamconfigs                                    crd.projectcalico.org/v1               false        IPAMConfig
ipamhandles                                    crd.projectcalico.org/v1               false        IPAMHandle
ippools                                        crd.projectcalico.org/v1               false        IPPool
ipreservations                                 crd.projectcalico.org/v1               false        IPReservation
kubecontrollersconfigurations                  crd.projectcalico.org/v1               false        KubeControllersConfiguration
networkpolicies                                crd.projectcalico.org/v1               true         NetworkPolicy
networksets                                    crd.projectcalico.org/v1               true         NetworkSet
这些api资源是属于calico的,因此不建议使用kubectl来管理,推荐按照calicoctl来管理这些api资源。 将calicoctl安装为kubectl的插件:
cd /usr/local/bin
curl -o kubectl-calico -O -L  "https://github.com/projectcalico/calicoctl/releases/download/v3.21.2/calicoctl"
chmod +x kubectl-calico
验证插件正常工作:
kubectl calico -h2、查看 Pod 是否成功启动
$ kubectl get pod -n kube-system

NAME                                       READY   STATUS    RESTARTS   AGE
calico-kube-controllers-6b64bcd855-jn8pz   1/1     Running   0          2m40s
calico-node-5wssd                          1/1     Running   0          2m40s
calico-node-7tw94                          1/1     Running   0          2m40s
calico-node-xzfp4                          1/1     Running   0          2m40s
coredns-58cc8c89f4-hv4fn                   1/1     Running   0          21m
coredns-58cc8c89f4-k97x6                   1/1     Running   0          21m
etcd-k8s-master                            1/1     Running   0          20m
kube-apiserver-k8s-master                  1/1     Running   0          20m
kube-controller-manager-k8s-master         1/1     Running   0          20m
kube-proxy-9dlpz                           1/1     Running   0          14m
kube-proxy-krd5n                           1/1     Running   0          14m
kube-proxy-tntpr                           1/1     Running   0          21m
kube-scheduler-k8s-master                  1/1     Running   0          20m
可以看到所以 Pod 都已经成功启动。
3、验证k8s DNS是否可用
kubectl run curl --image=radial/busyboxplus:curl -it
If you don't see a command prompt, try pressing enter.
[ root@curl:/ ]$进入后执行nslookup kubernetes.default确认解析正常:
nslookup kubernetes.default
Server:    10.96.0.10
Address 1: 10.96.0.10 kube-dns.kube-system.svc.cluster.local

Name:      kubernetes.default
Address 1: 10.96.0.1 kubernetes.default.svc.cluster.local
十、查看是否开启 IPVS(Master 节点)
上面全部组件都已经部署完成,不过还需要确认是否成功将网络模式设置为 IPVS,可以查看 kube-proxy 日志,在日志信息中查找是否存在 IPVS 关键字信息来确认。
$ kubectl get pod -n kube-system | grep kube-proxy

kube-proxy-9dlpz                           1/1     Running   0          42m
kube-proxy-krd5n                           1/1     Running   0          42m
kube-proxy-tntpr                           1/1     Running   0          49m
选择其中一个 Pod ,查看该 Pod 中的日志信息中是否存在 ipvs 信息:
$ kubectl logs kube-proxy-9dlpz -n kube-system

I1120 18:13:46.357178       1 node.go:135] Successfully retrieved node IP: 192.168.2.13
I1120 18:13:46.357265       1 server_others.go:176] Using ipvs Proxier.
W1120 18:13:46.358005       1 proxier.go:420] IPVS scheduler not specified, use rr by default
I1120 18:13:46.358919       1 server.go:529] Version: v1.16.3
I1120 18:13:46.359327       1 conntrack.go:100] Set sysctl 'net/netfilter/nf_conntrack_max' to 131072
I1120 18:13:46.359379       1 conntrack.go:52] Setting nf_conntrack_max to 131072
I1120 18:13:46.359426       1 conntrack.go:100] Set sysctl 'net/netfilter/nf_conntrack_tcp_timeout_established' to 86400
I1120 18:13:46.359452       1 conntrack.go:100] Set sysctl 'net/netfilter/nf_conntrack_tcp_timeout_close_wait' to 3600
I1120 18:13:46.359626       1 config.go:313] Starting service config controller
I1120 18:13:46.359685       1 shared_informer.go:197] Waiting for caches to sync for service config
I1120 18:13:46.359833       1 config.go:131] Starting endpoints config controller
I1120 18:13:46.359889       1 shared_informer.go:197] Waiting for caches to sync for endpoints config
I1120 18:13:46.460013       1 shared_informer.go:204] Caches are synced for service config
I1120 18:13:46.460062       1 shared_informer.go:204] Caches are synced for endpoints config
如上,在日志中查到了 IPVS 字样,则代表使用了 IPVS 模式。
十一、部署周边生态
1、安装包管理器helm 3
Helm是Kubernetes的包管理器,后续流程也将使用Helm安装Kubernetes的常用组件。 这里先在master节点node1上按照helm。
wget https://get.helm.sh/helm-v3.7.2-linux-amd64.tar.gz
tar -zxvf helm-v3.7.2-linux-amd64.tar.gz
mv linux-amd64/helm /usr/local/bin/执行helm list确认没有错误输出。
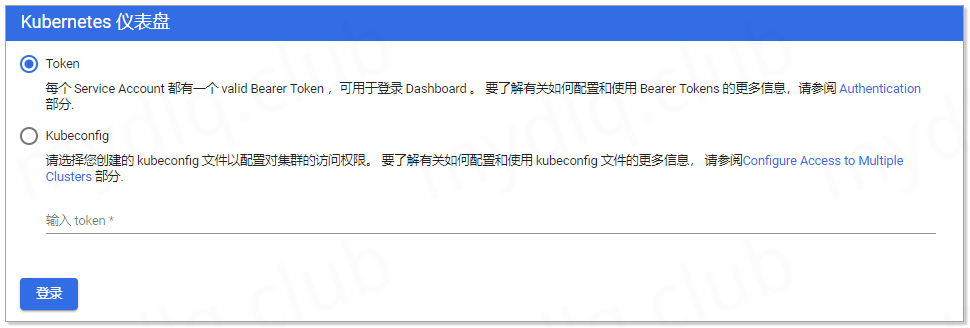
接下来我们将部署 Kubernetes 的控制看板,由于集群为 1.16.3,所以我们直接使用 Kubernetes Dashboard 2.0.0 版本。
由于 Dashboard 部署流程也比较多,所以写在另一篇博文中,可以参考 Kubernetes 部署 Kubernetes-Dashboard v2.0.0
当 Kubernetes Dashboard 部署好了后,输入 Kubernetes 集群任意节点地址配置上面配置的 Service 的 NodePort 30001 来访问看板。输入地址 https://192.168.2.11:30001 进入看板页面,输入上面获取的 Token 串进行验证登录。
提醒一下,由于谷歌浏览器访问自签名证书的网址时,可能会被拒绝访问,所以,这里推荐最好使用火狐浏览器访问。
十、配置 Kubectl 命令自动补全(Master 节点)
安装补全工具:
$ yum install -y bash-completion添加补全配置:
$ source /usr/share/bash-completion/bash_completion
$ source <(kubectl completion bash)
$ echo "source <(kubectl completion bash)" >> ~/.bashrc
添加完成就可以通过输入 kubectl 后,按补全键(一般为 tab)会自动补全对应的命令。
九、FAQ
1、修正 kubelet 无法读取资源错误
CentOS 系统上安装 Kubernetes 后 kubelet 组件会一直报 failed to get cgroup stats for "/system.slice/docker.service" 错误,而引起该问题的原因是 kubelet 启动时,会执行节点资源统计,需要 systemd 中开启对应的选项,如下:
- CPUAccounting:是否开启该 unit 的 CPU 使用统计,bool 类型,可配置 true 或者 false。
- MemoryAccounting:是否开启该 unit 的 Memory 使用统计,bool 类型,可配置 true 或者 false。
如果不设置这两项,kubelet 是无法执行该统计命令,导致 kubelet 一致报错误上面错误信息。所以需要修改 systemd 里面的 kubelet 服务配置,操作如下:
编辑 /usr/lib/systemd/system/kubelet.service.d/10-kubeadm.conf 文件,并添加下面配置:
$ vi /usr/lib/systemd/system/kubelet.service.d/10-kubeadm.conf

[Service]
CPUAccounting=true              ## 添加 CPUAccounting=true 选项,开启 systemd CPU 统计功能
MemoryAccounting=true           ## 添加 MemoryAccounting=true 选项,开启 systemd Memory 统计功能
Environment="KUBELET_KUBECONFIG_ARGS=--bootstrap-kubeconfig=/etc/kubernetes/bootstrap-kubelet.conf --kubeconfig=/etc/kubernetes/kubelet.conf"
Environment="KUBELET_CONFIG_ARGS=--config=/var/lib/kubelet/config.yaml"
EnvironmentFile=-/var/lib/kubelet/kubeadm-flags.env
EnvironmentFile=-/etc/sysconfig/kubelet
ExecStart=
ExecStart=/usr/bin/kubelet $KUBELET_KUBECONFIG_ARGS $KUBELET_CONFIG_ARGS $KUBELET_KUBEADM_ARGS $KUBELET_EXTRA_ARGS